Problem:
There are a few cases where a VM might stop booting up properly if the syntax in /etc/fstab is incorrect or if a data disk is missing (not attached to the VM) as well as other reasons.
Traditionally in Linux you can mount a scsi device by using the following format in fstab:
/dev/sdc1 /data ext4 defaults 0 0
However in cloud environments there is no way to guarantee the same scsi ID every time the Virtual Machines restarts, so the best way is to use UUID’s which can be obtained using the Linux command blkid .
To reliably mount disks the format should look like this:
UUID=”8be9efc9-61e7-4cc7-806s6-2d014745ae99″ /data ext4 defaults 0 0
For more information about how to properly add a data disk to a Linux VM, please check the following article:
How to Attach a Data Disk to a Linux Virtual Machine
After examining the serial log from a Linux VM that is not booting up under:
Virtual Machines > VMNAME > Support + troubleshooting > Boot diagnostics
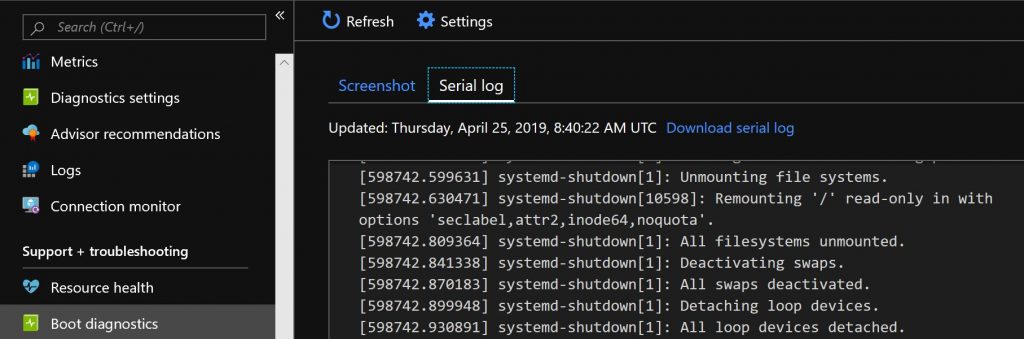
Example Error Messages:
You see messages similar to the four examples below:
(1) Example from a disk that was being mounted by the scsi id instead of UUID:
Timed out waiting for device dev-incorrect.device.
Dependency failed for /data.
Dependency failed for Local File Systems.
…
Welcome to emergency mode! After logging in, type “journalctl -xb” to viewsystem logs, “systemctl reboot” to reboot, “systemctl default” to try againto boot into default mode.
Give root password for maintenance
(or type Control-D to continue):
(2) Example from a missing device on CentOS
Checking file systems…
fsck from util-linux 2.19.1
Checking all file systems.
/dev/sdc1: nonexistent device (“nofail” fstab option may be used to skip this device)
/dev/sdd1: nonexistent device (“nofail” fstab option may be used to skip this device)
/dev/sde1: nonexistent device (“nofail” fstab option may be used to skip this device)
[/sbin/fsck.ext3 (1) — /CODE] sck.ext3 -a /dev/sdc1
fsck.ext3: No such file or directory while trying to open /dev/sdc1
/dev/sdc1:
The superblock could not be read or does not describe a correct ext2
filesystem. If the device is valid and it really contains an ext2
filesystem (and not swap or ufs or something else), then the superblock
is corrupt, and you might try running e2fsck with an alternate superblock:
e2fsck -b 8193 <device>
[/sbin/fsck.xfs (1) — /GLUSTERDISK] fsck.xfs -a /dev/sdd1
/sbin/fsck.xfs: /dev/sdd1 does not exist
[/sbin/fsck.ext3 (1) — /DATATEMP] fsck.ext3 -a /dev/sde1 fsck.ext3: No such file or directory while trying to open /dev/sde1
(3) Example that shows a VM unable to boot due to a fstab misconfiguration or disk no longer attached to the VM
The disk drive for /var/lib/mysql is not ready yet or not present.
Continue to wait, or Press S to skip mounting or M for manual recovery
(4) Example from serial log showing show incorrect UUID
Checking filesystems
Checking all file systems.
[/sbin/fsck.ext4 (1) — /] fsck.ext4 -a /dev/sda1
/dev/sda1: clean, 70442/1905008 files, 800094/7608064 blocks
[/sbin/fsck.ext4 (1) — /datadrive] fsck.ext4 -a UUID=”85171d07-215e-4fc7-a50a-bf09c7f2d2d9″
fsck.ext4: Unable to resolve ‘UUID=”85171d07-215e-4fc7-a50a-bf09c7f2d2d9″‘
[FAILED
*** An error occurred during the file system check.
*** Dropping you to a shell; the system will reboot
*** when you leave the shell.
*** Warning — SELinux is active
*** Disabling security enforcement for system recovery.
*** Run ‘setenforce 1’ to reenable.
type=1404 audit(1428047455.949:4): enforcing=0 old_enforcing=1 auid=4294967295 ses=4294967295
Give root password for maintenance
(or type Control-D to continue):
Recovery Options
1. Azure Serial Console
To recover the VM back to a normal state you have various options. The fastest way to recover a misconfigured configuration file is to use the Azure Serial console – documentation can be found here
Additional information has been documented in this BLOG Post
2. Disk Swap
If you are unable to access the serial console, you can use the OS disk swap feature which will aid recovery . The use of disk swap has been further improved by automated PowerShell and BASH scripts that can be executed directly in the Azure Cloud Shell
will need to delete the inaccessible VM and keep its OSDisk and deploy a new recovery VM using the same Linux distribution and version as the inaccessible VM.
3. Manual method
NOTE: We highly recommend making a snapshot or taking a backup of the VHD for the inaccessible VM before going through the steps for the recovery process, you can make a backup of the VHD by using Microsoft Storage Explorer, available at http://storageexplorer.com
The steps are described below:
A = Original VM (Inaccessible VM)
B = New VM (New Recovery VM)
- Stop VM A via Azure Portal
- For Resource Manager VM, we recommend to save the current VM information before deleting
- Azure CLI: azure vm show ResourceGroupName LinuxVmName > ORIGINAL_VM.txt
- Azure PowerShell: Get-AzureRmVM -ResourceGroupName $rgName -Name $vmName
- Delete VM A BUT select “keep the attached disks”
NOTE: The option to keep the attached disks is only available for classic deployments, for Resource Manager deleting a VM will always keep its OSDisk by default. - Once the lease is cleared, attach the Data Disk from A to VM B via the Azure Portal, Virtual Machines, Select “B”, Attach Disk
- On VM “B” eventually the disk will attach and you can then mount it.
- Locate the drive name to mount, on VM “B” look in relevant log file note each Linux is slightly different.
- grep SCSI /var/log/kern.log (ubuntu, debian)
grep SCSI /var/log/messages (centos, suse, oracle, redhat)
- grep SCSI /var/log/kern.log (ubuntu, debian)
- Mount the attached disk onto mountpoint /rescue
df -h
mkdir /rescue For Red Hat 7.2+
mount -o nouuid /dev/sdc2 /rescue For CentOS 7.2+
mount -o nouuid /dev/sdc1 /rescue For Debian 8.2+, Ubuntu 16.04+, SUSE 12 SP4+
mount /dev/sdc1 /rescue - Change into /etc directory where the original OS disk from resides
- cd /rescue/etc/
cp fstab fstab_orig
- cd /rescue/etc/
- Now that you have made a backup of you fstab you can proceed to make the changes you require using vi, nano or your favorite text editor, this may include commenting out entries by appending a # at the start of the line.
- vi fstab
cd /
umount /rescue
- vi fstab
- Detach the disk from VM B via the Azure portal
- Recreate the original VM A from the repaired VHD
For a Classic VM:
Recreate the original VM A (Create VM from Gallery, Select My Disks) you will see the Disk referring to VM A – Select the original Cloud Service name.
For a Resource Manager VM you will need to use either Powershell or Azure CLI tools, the articles below have steps to recreate a VM from its original VHD:
Recent Comments